Tips & Videos

Tips & Videos
We're here to show you how simple it is to shop for fresh fruits and vegetables, cook them easily and quickly, and serve your family their favorites the HappyHeathy way! The videos here will help you do all these things better than ever before. Check here often for new videos about easy ways to cook at home, how to be a HappyHealthy shopper, how to save money when you buy fresh fruits and vegetables, and how to handle food safely. Soon, you'll be a HappyHealthy expert!
-

3 Ways to Bake a Potato -

Add More Fruits and Vegetables to Your Day -

All Purpose Seasoning -

Chop, Slice, Dice, Mince, Peel, and Crush -

Cook Dried Beans in a Slow Cooker -

Cook Whole Grains and Pasta -

Cooking in the Oven -

Cooking on the Stovetop -

Create a HappyHealthy Kitchen -

Homemade Salsa Your Way -

How to Build Your Own Pizza -

How to Build Your Own Salad -

How to Cut Up a Whole Chicken -

How to Freeze Fresh Fruits and Vegetables -

How to Keep Food Safe -

How to Make Salad Dressings -

How to Make Soup -

How to Measure Food Using Your Hands -

How to Prepare Winter Squash for Cooking -

How to Store Fruits and Vegetables -

How To: Backpack Buddies -

How To: Handwashing -

How To: Kitchen Knife Basics -

How To: Step-by-Step Pasta Dinner -

How-To: Choose water -

How-To: How Children Can Help in the Kitchen -

How-To: Make Muffins -

How-To: Oatmeal Your Way -
How-To: Shopping Tips - Canned, Fresh, Frozen -

How-To: Step by Step Casserole -
How-To: Step by Step Chicken Bites -

How-To: Step by Step Stir Fry -

How-To: Use Leftovers -

Prepare Leafy Greens -

Preparing to Cook -

Quick and Easy Breakfast Ideas -

Quick and Easy Snack Ideas -

Roast Vegetables -

Sharpen Your Knife Skills
3 Ways to Bake a Potato
There are three easy ways to bake a potato:
- In the microwave
- In the oven
- In the slow cooker
For all methods, the first four steps are:
- Wash hands with soap and hot water.
- Clean the potatoes.
- Scrub the potatoes thoroughly under running water, then pat potatoes dry.
- Trim away any blemishes with a paring knife. You don’t have to remove all the eyes.
- Season the potatoes.
- Drizzle oil over the potatoes. It is easiest to use your hands, but a pastry brush works well.
- Prepare the potatoes.
- Poke the potatoes with a fork. This allows steam to escape while baking.
In the microwave
- Complete steps 1-3
- Place potatoes on microwave-safe dish
- Microwave at full power for 5 minutes
- Turn over potatoes
- For 1 potato, microwave 3 minutes. For 2 or more potatoes, microwave 5 minutes.
- Potatoes are done when soft. If needed, continue to microwave.
In the oven
- Complete steps 1-3
- Preheat oven to 425°
- For crispy potato skins, cook on a baking pan. For softer potato skins, wrap each potato in aluminum foil.
- Cook for 45 to 60 minutes until skin is crispy and potato is soft.
In the slow cooker
- Complete steps 1-3
- Wrap each potato in aluminum foil
- Place the potatoes in the slow cooker so they fit snugly next to each other. Stack 5 or more potatoes in a second layer if needed.
- Cover the slow cooker
- Cook on low for 8-10 hours
- The potatoes will be ready to eat when soft
(Sweet potatoes may require additional cooking time in the microwave, oven, or slow cooker.)
Check out these fun and tasty ways to top baked potatoes like:
- One Pan Fajitas
- Sloppy Joes
- Roasted broccoli with grated cheese
Serve while hot and enjoy!
Refrigerate leftovers within 2 hours.
Add More Fruits and Vegetables to Your Day
How to Add More Fruits and Vegetables to Your Day
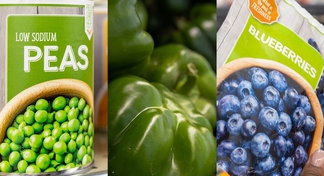
You have lots of choices:
- Canned fruits and vegetables
- Frozen fruits and vegetables
- Fresh fruits and vegetables
How to use canned fruits and vegetables:
Shop for:
- “Low Sodium,” “Reduced Sodium,” “No Salt Added” vegetables
- Canned fruit packed in “100% Juice” or “100% Fruit Juice
Drain and rinse canned vegetables to reduce sodium.
Add extra canned vegetables in soups, casseroles, salads, and sauces.
Use canned fruits as snacks, add to salads, or as a topping for yogurt.
How to use frozen fruits and vegetables:
Shop for frozen fruits and vegetables without added sauces, butter, gravies, or creams.
Frozen fruits and vegetables are quick and easy to use, and as nutritious as fresh.
Add vegetables to your family’s favorite meal.
Hint: add to soups or thaw and add to salads. Steam vegetables in the microwave for a tasty side dish.
How to use fresh fruits and vegetables:
For quick snacks, keep a bowl of fruit on your kitchen counter.
Cut up fruits and vegetables and make grab-and-go refrigerator snack packs.
Freeze your favorite fruit snacks (grapes, sliced bananas, and fresh strawberries).
Use them with a healthy yogurt dip.
Add them to traditional recipes and invent new family favorites.
- Add more celery to chicken or tuna salads.
- Add more shredded carrots to salads.
- Add more diced tomatoes to soups and spaghetti sauce.
Look for more ideas and recipes on HappyHeallthy.ms
All Purpose Seasoning
INGREDIENTS
- 2 tablespoons paprika
- 1 teaspoon cayenne pepper
- 2 tablespoons garlic powder
- 2 teaspoons onion powder
- 1 tablespoon dry mustard
- 1 teaspoon ground cumin
DIRECTIONS
- Wash hands with soap and hot water.
- Measure all ingredients.
- Combine all spices in small bowl.
- Mix together well.
- Keep in airtight container.
- Sprinkle on fish, chicken, and vegetables.
Chop, Slice, Dice, Mince, Peel, and Crush
How to Chop, Slice, Dice, Mince, Peel, and Crush
Wash your hands with soap and hot water.
To chop:
- Lay the fruit or vegetable on a cutting board and use a sharp knife.
- Remove the top and bottom.
- Cut the food in half so it can lie flat.
- Hold the food steady with your free hand.
- Curl your fingers into a claw.
- Tuck your knuckles underneath.
- Hold the flat side of the knife against your knuckles, with the entire knife lifted above the cutting board.
- Press downward and move the knife slightly forward as you cut.
- Lift the blade up and repeat.
To slice:
- Rinse the fruit or vegetable with water.
- Lay it on a cutting board and use a sharp knife.
- Remove the top and bottom.
- Cut it in half so it can lie flat.
- Hold the food steady with your free hand.
- Curl your fingers into a claw.
- Tuck your knuckles underneath.
- Hold the tip of blade against the cutting board, with the handle of the knife positioned upward.
- Continue by pressing down and forward, using full length of the blade to slice through the food.
To dice:
- Lay the fruit or vegetable on a cutting board and use a sharp knife.
- Remove the tips.
- Hold the knife parallel to the cutting board.
- Cut the food vertically, without cutting all the way through.
- Cut across the slices you just made. This will give you several pieces.
To crush:
- Place the fruit or vegetable on a cutting board.
- Use a heavy knife, such as a chef’s knife, and place the blade of the knife flat on the food, with the sharp side of the knife facing
- away from you.
- Use the heel of your hand to press the blade down on the food
To mince:
- Place the fruit or vegetable on a cutting board.
- Cut the food into thin slices.
- Turn the food and cut across the slices.
Cook Dried Beans in a Slow Cooker
How to Cook Dried Beans in a Slow Cooker
- Wash hands with soap and hot water.
- Place dried beans in a bowl.
- Add water to cover beans by 3 to 4 inches.
- Let beans soak overnight or 6 hours covered on the counter.
- Use colander to drain and rinse beans before cooking.
- Place soaked beans in crock pot.
- Add any seasonings: salt and pepper, garlic, jalapenos, onions (to taste).
- Cover with water by about 2 inches. Cook on low for 8 hours or high for 6 hours.
Cook Whole Grains and Pasta
To cook grains:
- Use a pot with a lid. Add water.
- Follow directions on package.
- Bring water to a boil. Leave pot covered to speed up boiling time.
- Add grain, stir, and bring to a boil again.
- Turn heat down to low.
- Place lid on pot. Follow package directions for cooking time.
- After recommended boiling time, take pot off heat.
- Use fork to fluff.
- Place lid on pot. Let stand 5 minutes.
To cook pasta:
- Add water to large pot (4 quarts for every pound of pasta).
- Bring water to a boil. (Leaving the lid on helps speed up boiling time.)
- Place pasta in boiling water and stir.
- When pasta starts to cook, stir again so noodles will not stick together.
- Follow cooking time on package.
- Taste before draining to make sure pasta is done. Pasta should be a little chewy.
- Drain in colander, being careful of the steam.
Cooking in the Oven
Cooking in the Oven
Baking:
Baking means to cook food in an over at a moderate temperature. Almost anything can be baked.
- Always preheat the oven.
- 350°F is used most of the time for baking.
- Follow directions in the recipe for oven temperature and baking time.
Roasting:
Roasting means cooking food in an uncovered pan in the oven. You can roast at low, medium or high temperatures.
- Use a heavy roasting pan.
- Cooking times:
- Vegetables usually roast at 400°F.
- Large roasts at 250°F to 375°F.
- Small cuts of meat 350°F to 375°F.
- Check temperature using a meat thermometer.
- Always let meat rest 10 to 20 minutes before slicing.
Broiling:
Broiling means quick cooking at a very high heat.
- Move over rack to highest position in the oven, about 3 to 4 inches from the top.
- Set oven to Broil.
- Preheat 5 minutes before cooking.
- Use a broiler pan, cast iron skillet or baking sheet.
- Leave oven door open slightly while broiling.
- Most foods will be done in 5 to 10 minutes
Cooking on the Stovetop
Cooking on the Stovetop
Steam:
Good for vegetables, potatoes, rice, fish, and seafood
- Put a small amount of water in a sauce pan.
- Bring the water to a simmer.
- Place food in a steam basket over the water and cover saucepan with lid.
- Steam until food is done or desired tenderness.
Sauté:
Good for meats, onions, and peppers
- Preheat skillet at medium-high heat.
- Add one Tablespoon of oil to pan.
- Add food to pan.
- Stir until lightly browned.
Caramelize/Brown:
Good for onions, apples, and carrots
- Use a pan or skillet.
- Set the stove to high heat.
- Add oil to pan.
- When pan gets hot, add the food.
- Once you begin cooking, keep the temperature at low.
- Stir often to make sure it does not burn.
- Cook until food is deep golden brown.
Simmmer:
Good for vegetables, soups and stews, and even large cuts of meat
- Cook food in skillet or sauce pan in liquid at medium heat.
- Food has bubbles gently rising to the surface, but not fully boiling.
Boil:
Good for pasta, some grains, and green vegetables
- Use a large pot with water or other liquids.
- Cook at high heat until bubbles break through and pop on the surface.
- Add food to the water or liquid to cook it.
Blanch:
Good for vegetables in salads so they will be softer to chew and to get fresh vegetables ready for freezing
- Food is put in boiling water just a few minutes.
- One you take it out, food is put into a mixing bowl with an ice water bath to stop the cooking process.
Create a HappyHealthy Kitchen
HappyHealthy Kitchen
The easiest way to enjoy a HappyHealthy lifestyle is to stock your kitchen the HappyHealthy way.
In the Freezer
Fruits and vegetables
- Buy frozen
- Choose vegetables without sauce or seasoning
- Choose fruits without added sugar or syrup
- Buy fresh and freeze
- When buying in bulk
- When growing your own
- Check out - How to Freeze Fresh Fruits and Vegetables
Meat, poultry, and seafood
- Buy frozen
- Choose lean meat
- Avoid sauces or seasoning
- Freeze from fresh
- When buying in bulk
- When you hunt or fish
Leftover dishes
- Cook once, eat twice or more
- Store in plastic bags with as much air removed as possible
- Be sure to label and date
In the Refrigerator
Fruits and vegetables
- Buy in season for best quality and to save money
- Use our guide to see what’s in season in Mississippi
- Store separately to keep fresh longer
- Store these fruits in the refrigerator
- Strawberries
- Apples
- Lemons
- Oranges
- Blueberries
- Store these vegetables in the refrigerator
- Cucumbers
- Lettuce
- Broccoli
- Squash
- Carrots
- Always look for 100% fruit or vegetable juice for drinking
Meat, poultry, seafood and eggs
- Choose lean meats and poultry
- Remove skin and fat when possible
- Store raw meat separately from fruits, vegetables, and prepared foods
- Place on trays or in containers to keep juices from dripping onto other foods
- Keep eggs on the bottom shelf in case one is cracked
- Keep eggs toward the back of the refrigerator where the temperature is colder
Dairy (milk, yogurt, cheese, cottage cheese, sour cream, butter)
- Choose low-fat
- Choose low-sugar
- Store milk on bottom shelf at the back where refrigerator is coldest
Prepared and cooked foods
- Prepare salads, dips, and snacks and keep in plastic bags or containers with lids
- Store leftovers in plastic bags or containers with lids
- Label and date prepared and cooked dishes and leftovers
- Keep prepared and cooked foods on top shelves away from raw meat and eggs
Condiments
- Once condiments (mustards, ketchup, mayonnaise, relishes, and pickles) have been opened, keep in the refrigerator door
In the Pantry
Fruits and vegetables
- Buy canned
- Choose fruits packed in water or 100% juice (not syrup)
- Choose vegetables that say “Low Sodium,” “No Salt Added,” or “Sodium Free” on the label
- Avoid vegetables that are already seasoned
- Diced tomatoes and beans are good to have on hand and can be used in many recipes
- Buy fresh
- Keep garlic, onions, potatoes and sweet potatoes in pantry away from light, but where air can get to them
Meat, poultry, and seafood
- Buy canned or sealed in packets
- Choose meats packed in water instead of oil
- Choose lean meats and remove skin
- Avoid high sodium options
Grains (rice, pasta, breads, cereals, crackers)
- Popcorn, oats, and oatmeal are whole grain options
- Look at the ingredients on the food label and make sure the first ingredient includes one of the following:
- Whole grain
- Whole wheat
- Brown rice, oats, oatmeal, or whole (other grain)
- Avoid high sugar cereals
Nuts
- Peanuts and pecans are easy to use in family menus
- Look for nuts and seeds at farmer's markets
- When buying peanut butter, avoid added salt or sugar
Dried herbs and spices
- Dried herbs and spices can add many health benefits and flavors
- Start with these and store in your pantry:
- Pepper
- Garlic powder
- Onion powder
- Italian seasoning
- Dried Oregano
- Chili Powder
- Salt
- Check out our All-Purpose Seasoning recipe
Oil
- Use vegetable oils for cooking
- Oil is also good for making salad dressings
- Vegetable oil spray is also a good option to have on hand for convenience
Flour, sugar, cornmeal, baking soda, cornstarch
- These ingredients are essential when making the occasional baked goods
- Use flour or cornstarch to thicken soups or sauces
- Make your own bread or cornbread
On the Counter
Fruits and vegetables
- Store these fruit and vegetables on the counter until they are ripe, then store in the refrigerator
- Eggplant
- Acorn squash
- Butternut squash
- Tomatoes
- Apples
- Oranges
- Bananas
- Keep a bowl of fruit on the counter for a quick snack
Homemade Salsa Your Way
You can make salsa out of almost everything.
Step 1
Start with fruit, vegetables, or both for a fresh beginning.
Measure 3 cups of your favorites:
- Tomato
- Peach
- Pineapple
- Watermelon
- Cucumber
- Strawberries
- Blueberries
Step 2
Add some spicy heat with fresh or dried jalapeno peppers.
Step 3
Add a handful of fresh herbs for lots of extra flavor.
- Cilantro
- Mint
- Parsley
Step 4
Add the must-haves are the key ingredients for every salsa.
- 1 cup chopped onion
- 1 chopped garlic clove
- 1 Tablespoon lime juice
- 1 teaspoon salt
Step 5
Mix it up.
- Chop everything into small cubes and mix together in a large bowl.
Try something new and different!
Go to HappyHealthy.ms for these salsa recipes:
- Black Bean and Corn Salsa
- Fruit Salsa
Everyone loves these classic salsas!
TOMATO SALSA
Makes 8 servings; ½ cup each serving
INGREDIENTS
- 2 14.5-ounce can petite diced tomatoes
- 1 bell pepper
- ½ large onion
- 1 lime
- 1 teaspoon minced garlic
- ½ teaspoon ground cumin
- ¼ teaspoon salt
- 2 Tablespoons fresh cilantro (optional)
DIRECTIONS
- Wash your hands well with soap and warm water for at least 20 seconds.
- Drain tomatoes and add to a medium bowl.
- Wash bell pepper.
- Dice the pepper and add to bowl with other ingredients.
- Peel the onion. Dice onion and add to bowl with other ingredients
- Roll lime on cutting board to soften. Cut lime in half. Squeeze juice over ingredients.
- Add garlic, cumin, and salt to bowl.
- Mix ingredients with large spoon or spatula.
- Wash fresh cilantro. Pat dry with a paper towel. Remove leaves and tear or cut into small pieces. Add to salsa mixture and stir.
- Refrigerate leftovers within 2 hours.
WATERMELON PINEAPPLE SALSA
Makes 10 servings; ½ cup each serving
INGREDIENTS
- 1 20-ounce can pineapple tidbits
- ½ mini seedless watermelon
- 1 10-ounce can diced tomatoes and green chilis
- ½ large onion
- ½ jalapeno, about 2 Tablespoons
- ½ teaspoon salt
- ¼ teaspoon cayenne pepper
DIRECTIONS
- Wash your hands well with soap and warm water for at least 20 seconds.
- Drain pineapple in colander. Add to large bowl.
- Rinse watermelon, remove rind, and dice watermelon into small pieces. Add to large bowl with pineapple.
- Drain tomatoes. Add to large bowl with other ingredients.
- Peel onion, cut in half, and dice. Add to mixture.
- Wash jalapeno, cut in half, and mince ½ of the pepper. Add 2 tablespoons to mixture.
- Add salt and cayenne pepper.
- Mix all ingredients together with a large spoon or spatula.
- Refrigerate leftovers within 2 hours.
How To: Backpack Buddies
How To: BackPack Buddies
HappyHealthy Supports Backpack Buddies
- Many elementary-age children go home Friday afternoons with no access to healthy foods and balanced meals over the weekend.
- Churches, community organizations, food pantries, and others throughout our state help these children by participating in the Backpack Buddies program.
- HappyHealthy invites you to join us and help provide healthy choices to bridge the weekend food gap.
Here's how to help:
- Donate quantities of our recommended items to participating organizations in your community
- Start a Backpack Buddies program and pack the weekly bags for children who have qualified for the program
Items in each pack should include:
- Kid-friendly (no glass jars, no large cans)
- Individually packaged or small and light enough to carry
- Shelf-stable
- Easy to prepare, even without a stove or other equipment
- Nutritious grains, vegetables, fruits, proteins, and dairy
- Each pack should be in a gallon size zip-top clear plastic bag
- Each bag should weigh 3 -3.5 pounds so it can easily slip into the child’s backpack and be easy to carry
Grains:
- Whole graham crackers
- Plain oatmeal
- Grits
- Pretzels
- Whole grain cereal
Vegetables:
- Tomato sauce
- Diced tomatoes
- Vegetable soup
- Canned vegetables:
- Peas
- Corn
- Green beans
- Carrots
- Mixed vegetables
Fruit:
- Small fresh apples
- Large fresh oranges
- Applesauce
- Raisins
- Canned fruit or fruit cup (in 100% juice or light syrup)
Protein:
- Tuna, salmon, or chicken (canned or packets)
- Peanut butter
- Pecans
- Peanuts
- Beans – cooked or canned
- Kidney
- Pinto
- Black
- Lentils
- Navy
Dairy:
- Shelf-stable low-fat milk
The following amounts are suggested for elementary-aged school children to compare to school breakfasts, lunches, and snacks:
In order to meet the ½ of the recommended nutrition needs for the weekend, each backpack should include:
- 5 ounces Grains
- 2 cups Vegetables
- 1.5 cups Fruit
- 4 ounces Protein
- 3 cups Milk
So get packing! Enjoy the rewards of helping children have the nutritious food they need over the weekend.
It's the HappyHealthy way!
How to Build Your Own Pizza
How To: Build Your Own Pizza
Step 1-The Crust: Choose your favorite crust—try something different!
• English Muffins
• Bagels
Step 2—The Sauce
• Spaghetti Sauce
• Pizza Sauce
Step 3—The Toppings: Here's where it gets creative—what's your favorite combination?
• Pepperoni
• Ground Beef
• Grilled Chicken
• Ham
• Tomatoes
• Mushrooms
• Spinach
• Kale
• Broccoli
• Zucchini
• Onions
• Peppers
Step 4—The Cheese: Sprinkle these on!
• Mozzarella
• Parmesan
• Cheddar
Step 5—The Herbs and Spices: The finishing touch—top it off!
• Oregano
• Black Pepper
• Red Pepper Flakes
Make it your way! A great way to involve children in preparing a snack or meal. Here’s a little something HappyHealthy!
INGREDIENTS
- 2 whole wheat English muffins
- 4 Tablespoons tomato sauce
- 6 Tablespoons shredded mozzarella cheese
- ½ cup vegetables or cooked meat cut into small pieces
DIRECTIONS
- Preheat oven to 400°F.
- Wash your hands well with soap and warm water for at least 20 seconds.
- Open English muffins and place halves on a baking pan. Toast muffins for about 5 minutes.
- Remove muffins from oven and spread 1 Tablespoon sauce on each muffin half.
- Add 1 Tablespoon cheese to each muffin half.
- Add 2 Tablespoons toppings of your choice, then top with another ½ Tablespoon cheese.
- Place baking pan in the oven for 8 to 10 minutes. Let mini pizzas cool for a couple of minutes before serving.
- Refrigerate leftovers within 2 hours.
How to Build Your Own Salad
BUILD YOUR OWN SALAD
5 Easy Steps to Building a Healthy Salad
Step 1: The Greens—A Delicious Foundation
Use one type of salad greens or combine your favorites for color and flavor
∙ Mixed Greens
∙ Kale
∙ Romaine Lettuce
∙ Red or Green Leaf Lettuce
∙ Baby Spinach
Step 2: Fruits and Vegetables
Combine traditional favorites or create something new and different
∙ Green Beans
∙ Canned Beans
∙ Corn
∙ Mandarin Oranges
∙ Pineapple
∙ Strawberries
∙ Blueberries
∙ Cucumber
∙ Bell Pepper
∙ Cauliflower
∙ Carrots
∙ Apples
∙ Grapes
∙ Oranges
Step 3: The Crunch
Add some great texture and flavor! Time to be creative.
∙ Pecans
∙ Peanuts
∙ Celery
∙ Radishes
Step 4: Extra Flavor
Sprinkle on a few toppings for a tasty treat. There are lots of choices.
∙ Hard boiled eggs
∙ Cheese
∙ Onions, variety
Step 5: The Dressing
Put it all together
Use no more than 2 Tablespoons
∙ Fresh Squeezed Juice: lemon, lime, orange and grapefruit, salt and pepper
∙ Salsa
∙ Vinaigrette
Check out our dressing recipes:
∙ Balsamic Vinaigrette
∙ Ranch Dressing
∙ Honey Mustard Dressing
∙ Italian Dressing
This salad is sure to be a family favorite
Spinach Salad
Makes 6 servings
- 5 cups baby spinach (washed, dried, stems removed)
- ½ cup strawberries
- ½ cup pecans
- ½ cup Balsamic Vinaigrette
- Add spinach, strawberries, pecans, and dressing to a large bowl.
- Toss to combine.
- Serve immediately.
Find more delicious salad recipes:
- Kale Salad
- Broccoli Salad
- Cucumber and Tomato Salad
- Creamy Fruit Salad
How-To: Choose water
Choose Water!
Getting enough water each day is important. Without enough water, you can become dehydrated, which may case health problems and stress on the body.
Dehydration occurs when your body loses more fluid than you drink.
Signs of dehydration:
- Thirst
- Dry mouth
- Decreased urine
- Dark yellow urine
- Lack of energy
- Headache
- Sleepiness
- Confusion or Irritability
- Dizziness
- Fainting
- Rapid heartbeat
- Rapid breathing
How much water do you need every day?
The amount of water you need each day varies by:
- Age
- Time spent in hot or cold temperatures
- Physical activity level
- Health
- If you are pregnant or breastfeeding
- Adults should get between 6 to 8 glasses of water daily
- Drink water throughout the day and with meals
10 tips for drinking more water:
- Tip 1 – Set goals – don’t jump immediately to a goal of 8 glasses of water a day. Start small and improve little by little.
- Tip 2 – Get a bottle or cup you’ll use.
- Tip 3 – Carry a water bottle with you in the car, at school, at home and at work.
- Tip 4 – Use a marked bottle that shows how much you’ve consumed throughout the day.
- Tip 5 – Place a pitcher of water in your refrigerator. You’ll have cold water ready to drink and can keep track of how much you are drinking.
- Tip 6 – Use a straw or add ice cubes.
- Tip 7 – Avoid beverages with lots of caffeine like tea and coffee which can cause water loss.
- Tip 8 – Replace sugary drinks such as soda and energy drinks with water.
- Tip 9 – Make flavor water by adding slices of fruits or vegetables (use within 2 days)
- Tip 10 – Keep a glass of water by your bed at night for easy access.
If you get drinking water from a well, test the water regularly for safety – at least once a year.
3 options for testing drinking water from a well:
- Contact a private laboratory.
- Contact the MSDH Division of On-Site Wastewater (1-855-220-0191) or online at: www.healthyms.com/wwapply
- Contact Mississippi State University Extension’s Mississippi Well Owner Network (1-866-325-1788) or online at: www.extension.msstate.edu/natural-resources/water/mswon
Stay HappyHealthy and Hydrated!
How to Cut Up a Whole Chicken
Getting ready:
- Have a bowl ready for chicken pieces
- Wash your hands
Cut off the wing:
- Pull the wing away from the body
- Cut from the top down through the joint
Cut the skin between the leg and body:
- Cut the skin (not meat) to see where the leg connects to the body
- Put down the knife
Break the hip joint:
- Hold a leg in each hand and lift the chicken
- Bend the leg backward until the joint pops
Cut off the leg and thigh:
- Lay the chicken on its back
- Cut the leg and thigh away from the body
Separate the leg and thigh:
- Bend the leg to find the joint
- Cut through the joint
Cut between the breasts:
- Make a shallow cut along the breastbone
- Use your fingers to loosen the meat from the bone
Cut breast away from ribs:
- Guide the knife along the ribcage
- Make small cuts with the knife tip, pulling the meat away from the bone
Cut off the breast:
- Cut the breast away from the body
- Repeat steps 7-9 on the other side
Clean up:
- Remove the skin and any excess fat
- Sanitize the knife and cutting board
- Wash your hands
How to Freeze Fresh Fruits and Vegetables
How to Freeze Fresh Fruits and Vegetables
Freezing Vegetables:
To freeze many vegetables, you have to blanch them first.
- Use one gallon of water for every pound of vegetables.
- Pour vegetables in a pot of boiling water.
- Cover with a lid.
- Bring to boil again.
- Let vegetables cook for a few minutes.
- Corn, small ears—7 minutes
- Whole kernel corn—4 minutes
- Okra—3-4 minutes
- Green Beans—3 minutes
- Summer squash—3 minutes
- Remove pot from heat.
- Quickly place vegetables into large bowl filled with ice water.
- Allow vegetables to drain and store in heavy weight, air tight containers or freezer bags.
- Fill containers to top and remove as much air as possible from freezer bags.
Freezing Fruit:
Always rinse fruit and allow time to dry before freezing.
Apples and Pears
- Core, peel and cut in quarters or slices.
- Toss in lemon juice diluted with water (1 Tablespoon lemon juice in 1 cup water) so they don’t brown.
Blueberries and Blackberries
- Leave whole for freezing.
Melons
- Cut in cubes or slices.
Peaches
- Peel, take out pits, and slice.
Strawberries
- Cut off green caps, cut in halves or quarters.
Bananas
- Cover baking sheet with wax paper or foil.
- Spread fruit slices in single layer on baking sheet.
- Place flat in freezer for several hours.
- Place frozen slices in freezer bags with label and date.
- Press out as much air as possible to seal.
How To: Handwashing
How To: Handwashing
Wash Your Hands
Handwashing is the best way to prevent the spread of germs.
How do we get germs?
All of us pick-up germs from our everyday activities:
- Playing with a pet
- Tending to a garden
- Riding a bike
- Going to the gym
- Handling raw meat
- Using your cell phone
Take time to wash your hands throughout the day.
The more you wash your hands the fewer germs you carry and the less likely you are to get sick or make someone else sick.
Always wash your hands:
- For at least 20 seconds
- Before you prepare or eat food
- After sneezing or coughing
- After using the toilet
Follow these 6 steps to wash your hands using soap and water:
- Wet your hands with cold or warm running water
- Apply soap to your hands and lather well
- Make sure to scrub all parts of your hands including palms, backs, fingers, and under your nails
- Rinse your hands under running water
- Once rinsing is complete, take a paper towel to turn off the faucet
- Dry your hands using a clean towel or allow them to air dry
When should I use hand sanitizer?
Hand sanitizer is the perfect option when soap and water is not available.
For hand sanitizer to be most effective at killing germs:
- Use hand sanitizer that is at least 60% alcohol
- Use enough sanitizer to cover entire surface of your hands
- Rub your hands together until they feel dry
- Never rinse or wipe off hand sanitizer before it dries
It’s better to use soap and water:
- If your hands are visibly soiled
- After handling any chemicals
How-To: How Children Can Help in the Kitchen
How-To: How Children Can Help in the Kitchen
Helping in the Kitchen:
Children learn lifelong skills from helping you in the kitchen. With your help, they learn about healthy eating and cooking, and spend quality time with you. The most important thing is to give them tasks that they can successfully do at their age.
Here are a few ideas to get you started:
- Wash hands well with soap and warm water for at least 20 seconds.
4 to 5 years old:
- At this age, your child is ready to help with simple tasks which help to develop eye and hand coordination.
- Cut soft foods with a plastic knife.
- Roll out pizza or bread dough.
- Measure and level dry ingredients with a straight edge.
- Whisk a vinaigrette.
- Spray countertop with cleaner and wipe it clean.
- Mix a simple recipe.
- Wash fruits and vegetables.
6 to 9 years old:
- More advanced kitchen tasks are appropriate for this age group.
- Line a pan with aluminum foil and spray with cooking spray.
- Form balls or patties.
- Scoop batter into muffin cups.
- Crack an egg.
- Scrape out the mixing bowl.
- Place fruit onto skewers.
- Help put groceries away.
- Wash fresh fruits and vegetables.
- Opening can with can opener and draining in colander.
There are many ways to get children excited about helping in the kitchen, and enjoying HappyHealthy Living!
How to Keep Food Safe
How to Keep Food Safe
Step 1- CLEAN
- Wash hands the right way—at least 20 seconds with soap and hot running water
- Wash counter tops and utensils every time you use them
- Wash fresh fruits and vegetables under running water; drain in colander
Step 2-SEPARATE
- Use one cutting board for fresh fruits and vegetables; use a different cutting board for raw meat, poultry, or seafood
- Use separate plates and utensils for cooked and raw foods
- Wash all plates, utensils, and cutting boards that were used for raw meat, poultry, seafood, or eggs
- Keep meat, poultry, seafood, and eggs separate in your shopping cart, grocery bags, and refrigerator
Step 3-COOK
- Cook food to the right temperature
- Use a food thermometer; place the thermometer in the thickest part of the food to see if it’s done
- Keep food hot after cooking at 140°F
- Microwave food to 165°F
Step 4-CHILL
- Refrigerate food within 2 hours
- Don’t overfill your refrigerator; give your food some room
- Keep refrigerator set between 40°F and 32°F
- Freezing keeps food safe until you can cook it
- Set freezer at 0°F or below
- Never thaw or marinate food on the counter top
- Thaw food in refrigerator, microwave, or in cold water
- Always marinate food in the refrigerator
How To: Kitchen Knife Basics
Kitchen Knife Basics
Follow these tips to buy, use and care for your knives
Shopping Tips
Find a good fit:
- Handles have different shapes
- Hold a few knives in your hand before buying
- Some may feel more comfortable than others
The essentials:
- You don’t have to buy a knife block set, you can buy them individually
- Most kitchen tasks can be done with just a few knives
Start with these three essentials
- Chef’s knife
- Paring knife
- Serrated knife
Chef’s knife (8 to 10-inch blade)
- Almost all cutting can be done with this knife
- If you can only buy one knife, buy a Chef’s knife first
Paring knife (3 to 4-inch blade)
- Use to peel or cut fruits and vegetables into small pieces
Serrated knife (8 to 10-inch blade with small “teeth”)
- A long knife like a Chef’s knife but the blade is jagged, rather than smooth
- Good for slicing bread and cutting soft-skinned produce like tomatoes
Safety Tips
Never put a knife in a sink full of water
- You may forget the knife and cut yourself
- And never put your knives in the dishwasher
Never try to catch a falling knife
- If you drop it, take a quick step back so it doesn’t cut your toes or bounce back on you
When sharing a knife:
- Hand it off by the handle
- Or set it down and let the other person pick it up
Carrying a knife:
- Always walk with the blade pointed toward the floor
- This helps to avoid cutting someone who may come into your path
When not using your knife:
- Place it at the top of your cutting board
- Keep the blade facing away from you
Keep knives sharp:
- A dull knife requires more force, which can lead to slipping
- To sharpen knives, use a steel to align the edges of the blade
- Or use a pull through knife sharpener
- Do not sharpen serrated knives – it could ruin the knife
Using Knives Safely
- Watch your fingers: Tuck your fingers toward your palm on the hand that his holding the food
- Lead with the tip: Angle the tip of the knife toward the cutting board
- Slice: Cut through the food with a single motion, don’t push down
- Create a flat surface: When working with round foods like onions or potatoes, cut them in half first, lay the flat side down, then continue cutting
Practice these kitchen knife basics and enjoy creating delicious meals!
How-To: Make Muffins
Muffins can be made using the following simple steps:
Dry Ingredients
- Flour (all purpose, whole wheat)
- Baking Powder
- Salt
- Sugar (white, brown)
Wet Ingredients
- Eggs
- Low-fat milk
- Unsalted Butter
- Vegetable Oil
- Vanilla Flavoring
Muffins can include the following optional dry flavors (1 – 1 ½ teaspoons total):
- Ground Cinnamon
- Ground nutmeg
- Ground allspice
- Pumpkin pie spice
Fruits and Vegetables (2 cups total):
- Blueberries, or other fresh or frozen (not thawed) berries
- Diced or mashed bananas
- Canned pineapple tidbits, 100% Juice
- Shredded apples or pears
- Shredded carrots or zucchini
Optional Add Ins (up to ½ cup total):
- Dried fruit, such as raisins, or cranberries
- Toasted chopped or slivered nuts
Try this Carrot Zucchini Raisin Muffin recipe:
Ingredients
- 1 cup zucchini, shredded (1 medium)
- 1 cup carrots, shredded (2 medium)
- Vegetable Oil Cooking Spray
- 1½ cups whole wheat flour
- 1 cup all-purpose flour
- 1½ teaspoon baking powder
- ¼ teaspoon salt
- 1 teaspoon cinnamon
- 2 large eggs
- 1 cup low-fat milk
- 2/3 cup brown sugar
- 2 Tablespoons unsalted butter, melted
- 2 Tablespoons vegetable oil
- 2 teaspoons vanilla flavor
- ½ cup raisins
DIrectionS:
- Preheat oven to 400°F.
- Wash your hands well with soap and warm water for at least 20 seconds.
- Wash zucchini and carrots. Shred and set aside.
- Spray a 12-cup muffin pan with vegetable oil cooking spray.
- In a large bowl, whisk whole wheat flour, all-purpose flour, baking powder, salt and cinnamon.
- In a medium bowl, whisk eggs, low-fat milk, brown sugar, butter, oil, and vanilla. Stir in zucchini, carrots, and raisins.
- Add wet mix to dry mix. Stir to combine.
- Fill each muffin cup 2/3rds full with batter. Bake muffins 20-25 minutes, until a toothpick comes out clean.
- Cool for 10 minutes.
- Refrigerate leftovers within 2 hours.
Try these combos!
- Spiced Banana-Nut Muffins:
- Add ½ teaspoon each ground cinnamon, nutmeg, and allspice to the dry mix.
- Combine wet and dry mixes. Stir in diced bananas and chopped pecans.
- Carrot-Zucchini-Raisin Muffins
- Add 1 teaspoon ground cinnamon to the dry mix.
- Combine wet and dry mixes. Stir in carrots, zucchini and raisins.
- Blueberry Muffins
- Combine wet and dry mixes. Stir in blueberries
Helpful Hints:
- To freeze leftover muffins, wrap each one in plastic wrap. Place in an airtight container. Freeze up to 1 month.
- Use fruits and vegetables that are starting to get too ripe.
How-To: Step by Step Chicken Bites
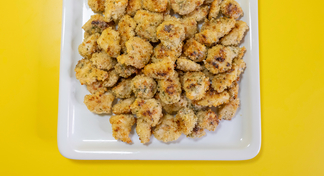
STEP BY STEP CHICKEN BITES
Chicken Bites are a great alternative to fast food chicken nuggets the whole family will love.
Can use boneless chicken breast or chicken thighs
- Preheat oven to 375 degrees.
- Wash your hands well with soap and warm water for at least 20 seconds.
- Trim chicken of fat. Cut into 1-inch cubes.
- Wash your hands well with soap and warm water for at least 20 seconds.
- Place cubed chicken in a large bowl. Add cornstarch and garlic powder. Stir to coat the chicken.
- In another bowl, whisk egg. Add egg to chicken and stir.
- Spray a sheet pan with vegetable oil cooking spray.
- In a large plastic storage bag, add breadcrumbs. Add chicken to bag. Seal and shake.
- Spread chicken evenly onto baking sheet.
- Bake for 15 minutes. Turn chicken over and bake for another 15 minutes.
Try these sauces!
Ranch
BBQ
Honey Mustard
Buffalo
- While the chicken is baking, in a large bowl stir sauce ingredients.
- Add baked chicken to the sauce and stir.
- Refrigerate left overs after two hours.
How to Make Salad Dressings
Balsamic Vinaigrette
Makes 14 servings, 1 tablespoon per serving
INGREDIENTS
- 1/2 cup balsamic vinegar
- 11/2 cups oil
- 2 teaspoons minced garlic
- 2 teaspoons dried Italian seasoning
DIRECTIONS
- Wash your hands well with soap and hot water.
- Combine all ingredients in a jar and shake until smooth. Cover and chill until ready to serve.
- Refrigerate leftovers within 2 hours. Use within one month.
NOTE: For more flavor, add 1 teaspoon of any of the following extra ingredients to your liking: mustard, shallots, fresh herbs.
Ranch Dressing
Makes 14 servings, 2 tablespoons per serving
INGREDIENTS
- ½ cup low-fat mayonnaise or low-fat sour cream
- 1 cup low-fat buttermilk
- 2 teaspoons dried or fresh parsley
- 2 teaspoons garlic powder
- 1 teaspoon onion powder
- ½ teaspoon salt
- ½ teaspoon black pepper
DIRECTIONS
- Wash your hands well with soap and hot water.
- Combine all ingredients in a jar and shake until smooth. Cover and chill until ready to serve.
- Refrigerate leftovers within 2 hours. Use within 2 weeks.
Honey Mustard Dressing
Makes 12 servings, 2 tablespoons per serving
INGREDIENTS
- 1 cup low-fat plain yogurt
- ½ cup non-fat or 1% milk
- ¼ cup honey
- 1 tablespoon plus 1 teaspoon mustard
- Dash of cayenne pepper (optional)
DIRECTIONS
- Wash your hands well with soap and hot water.
- Combine all ingredients in a jar and shake until smooth. Cover and chill for 30 minutes before serving.
- Refrigerate leftovers within 2 hours. Use within 2 weeks.
How to Make Soup
There are two easy ways to make soup:
- In a stock pot
- In a slow cooker
Use what you have to make soup. No recipe required.
In a stock pot
Basic steps are:
- Heat fat
- Add vegetables
- Cook protein
- Add stock and spices
- Bring to a boil
- Turn down to a simmer
Step 1
Wash hands with soap and hot water
Step 2
Heat a large soup pot over medium high heat. Add 1 tablespoon vegetable oil (for soups with tomato, stock or broth base) or add 2 tablespoons butter (for cream soups).
Step 3
Add about 1 to 2 cups of any chopped or diced root or fragrant vegetables (potatoes, carrots, beets, onions. Garlic, celery, peppers, etc.) Sauté until onions are clear or root vegetables are soft, about 5 minutes.
Step 4
Add 1 pound of raw meat. Sauté until lightly browned, about 5 minutes. Or add cooked met or non-meat protein (beans or lentils). For cooked meat or plant-based protein, additional sautéing is not necessary.
Step 5
Add 4 cups of a liquid base (low-sodium beef, chicken or vegetable stock or broth, tomato sauce, water, etc. If you are planning to use. If planning to us cream or milk, save until the last step.
Step 6
Do any spices (salt, pepper, thyme, rosemary, basil, oregano, chili powder, etc.) If using, add frozen.
Step 7
Bring mixture to boil. Reduce heat. Simmer for 25 to 30 minutes.
Step 8
Add about 1 to 2 cups of chopped softer vegetables (spinach, zucchini, greens, tomatoes, etc. or canned vegetables.
NOTE: if using cooked whole grains, uncooked pasta, cream, or milk, add during the last 5 to 10 minutes of cooking time.
In a slow cooker:
Basic steps are:
- Add protein
- Add root or fragrant vegetables
- Add fat
- Mix well
- Add 4 cups stock, 1 to 2 cups softer vegetables or canned/frozen vegetables and spices.
- Cover and cook on high for 3 to 4 hours or low for 6 to 8 hours. If using cream or milk, be sure to cook soup on low for 6 to 8 hours.
NOTE: Serve over cooked whole grains or add uncooked pasta during last 10 minutes of cooking time.
Serve while hot and enjoy.
Refrigerate leftovers within 2 hours.
How to Measure Food Using Your Hands
How to Measure Food Using Your Hands
Control your portions even when you don’t have measuring cups or spoons. Judge the size of your serving by using your hand.
- ½ cup = cupped hand
Measure grains, brown rice, whole wheat pasta, beans, cooked vegetables
- 1 cup = 2 cupped hands
Measure grains, brown rice, whole wheat pasta, beans, cooked vegetables
- 3 ounces = open palm of hand
The perfect serving of beef, poultry, pork or fish
- 1 teaspoon = fingertip
Butter, mustard, mayonnaise, sauces
- 1-2 Tablespoons = thumb
Salad dressing, peanut butter, hard cheese
- 1 cup = clinched fist
Cereal, fresh fruits, salads, casseroles
How-To: Oatmeal Your Way
Oatmeal is one of the easiest and most popular breakfast choices for kids and adults
A bowl of creamy, hot oatmeal:
• Lowers blood sugar levels
• Reduces the risk of heart disease
There are two types of oatmeal:
• Traditional oats
• Steel cut oats
The most budget-friendly option is traditional oats, which comes in three types:
• Old fashioned
• Instant
• Quick 1-minute
HappyHealthy recommends traditional old fashioned for you and your family.
There are two ways to cook old fashioned oats:
• On the stovetop
• In the microwave
Cook on the stovetop:
Makes one serving
Ingredients:
- ½ cup of old fashioned oats
- 1 cup of water or milk
- Pinch of salt
Directions:
- Boil water or milk in a saucepan
- Stir in oats and pinch of salt
- Cook about 5 minutes over medium high heat
- Stir occasionally while cooking
Cook in the microwave:
Makes one serving
Ingredients:
- ½ cup of old fashioned oats
- 1 cup of water or milk
- Pinch of salt
Directions:
- Combine water or milk and oats in medium microwave-safe bowl
- Add pinch of salt
- Microwave on high for 2 ½ to 3 minutes
- Stir before serving
Healthy Additions:
• Get creative with toppings
• Flavor combinations are endless
• Fresh Fruit (or frozen) such as bananas, strawberries, blueberries, melons, apples, peaches, pears
• Dried fruit such as raisins, cranberries, apricots, prunes
• Spices such cinnamon, nutmeg, cloves, pumpkin pie spice
• Nuts and seeds such as pecans, peanuts
• And so much more such as peanut butter, apple sauce, granola
Here’s a quick and easy oatmeal recipe:
Overnight Oats with Blueberries
Makes 1 ¾ cup serving
Ingredients:
- ½ cup blueberries (fresh or frozen)
- ½ cup old fashioned oats (uncooked)
- ½ cup low-fat yogurt
- ¼ cup low-fat milk
Directions:
- Wash your hands well with soap and water for at least 20 seconds
- Wash blueberries and set aside to drain on a paper towel or in a colander
- Combine blueberries, oats, yogurt and milk in a jar or container with a lid
- Shake to combine ingredients
- Chill overnight in the refrigerator or for at least 6 hours
- Serve and enjoy!
- Refrigerate leftovers within 2 hours
How to Prepare Winter Squash for Cooking
How to Prepare Winter Squash for Cooking
Choose your favorite from many types of winter squash
- Spaghetti Squash
- Acorn Squash
- Butternut Squash
- Wash your hands with soap and hot water.
- You need:
- Cutting board
- Large sharp chef knife
- Cut a thin piece off bottom or side of squash to keep squash from rolling.
- If recipe says to peel squash, peel it in thin strips with knife.
- Cut squash in half. Be careful to keep knife from slipping and cutting your hand.
- Use spoon to take out seeds. Discard seeds.
How-To: Shopping Tips - Canned, Fresh, Frozen
Enjoy fruits & vegetables in all forms!
When shopping for groceries, fruits and vegetables are available in many forms:
- Canned
- Fresh
- Frozen
Add more canned, fresh, and frozen fruits and vegetables to your grocery list:
- They are healthy choices
- Count toward your daily goal of five or more servings each day
- Provide variety in your meals
- Are easy to prepare and use in recipes
Shop for fruits and vegetables in all their forms:
- Canned
- Fresh
- Frozen
Benefits of canned fruits & vegetables:
- Picked and canned at peak freshness so flavor and nutrients are preserved
- Cooked prior to canning, so they require a short cooking time to be ready to eat
- Available year round and costs less than out of season fruits and vegetables
- Canned items may last from two to four years in your pantry and still be safe to eat
- Choose canned vegetables low in sodium and fat
- Choose fruit canned in 100% juice with no added sugar
Benefits of fresh fruits & vegetables:
- Greater variety
- You’re able to touch, smell, and see the fruits and vegetables before you buy
- Can cost less when purchased in season
What does it mean to eat in season?
- Eating fresh foods being harvested right now close to home
Why is it good to eat in season?
- You save money
- Food tastes better
- Food is more nutritious
How can I eat more seasonal foods?
- Know what’s in season
- Visit your local farmer’s market
- Check the signs at your store
- Stickers show where the food was grown
- Ask the store manager for locally-grown food
Benefits of frozen fruits & vegetables:
- Picked and frozen at peak freshness so flavor and nutrients are preserved
- Frozen items may last up to six months in your freezer and still be good to eat
- Can cost less than out-of-season produce
- Long shelf life (up to 6 months)
- Little preparation required – the washing and slicing is already done
- Available year-round
Tips for buying fresh fruits & vegetables:
- Purchase fresh produce in season to save money
- Ask the store clerk how to select fresh produce
- Purchase enough fresh produce for your family to last until you shop again
- Use fresh produce as soon as possible to enjoy peak flavors
Tips for buying frozen fruits & vegetables:
- Choose frozen fruits or vegetables with no sodium, sugar, or fat added
Use recipe substitutions:
- Choose something in season when the recipe calls for an out-of-season ingredient
Freezing produce:
- Freeze fruits and vegetables purchased in season to use in out-of-season months
How to Store Fruits and Vegetables
How to Store Fruits and Vegetables
When you select or purchase fruits and vegetables from a garden, farmers market, or grocery, store fresh fruits and vegetables the right way:
- For best flavor
- To last longer
- To stretch your food dollars
Store these fruits in the refrigerator:
- Apples (to keep them more than 7 days)
- Blackberries
- Blueberries
- Grapes
- Strawberries
Store these vegetables in the refrigerator:
- Green Beans
- Broccoli
- Cabbage
- Carrots
- Celery
- Greens (collards, mustard, turnip)
- Summer Squash
- Sweet Corn
- Cucumbers
- Lemons
- Peppers
Keep these fruits on the counter until they're ripe, then store in the refrigerator:
- Peaches (until soft to touch and fragrant)
- Pears (until soft to touch)
- Plums (until soft to touch and fragrant
- Persimmons
- Melons (until ripe)
Keep these on the kitchen counter:
- Apples (no longer than 7 days)
- Bananas
- Eggplant
- Oranges
- Melons
- Tomatoes
- Winter Squashes
Keep the following in the pantry, a cabinet or box, away from light where air can get to them:
- Garlic
- Onions
- Potatoes
- Sweet Potatoes
HappyHealthy Top 7 Tips
How to make fresh fruits and vegetables last longer
Tip #1
- Remove rubber bands and twist ties to allow for circulation.
Tip #2
- Use fruits and vegetables within 1-3 days for maximum flavor and freshness.
Tip #3
- Always store your fruits and vegetables separate from raw meat.
Tip #4
- Always rinse fresh fruits and vegetables under running water before using.
Tip #5
- Wash:
- Leafy Greens
- Spinach
- Lettuce
Tip #6
- Store vegetables separate from fruit.
Tip #7
- It is not necessary to wash fruits and vegetables labeled “ready to eat,” “washed,” or “triple washed.”
How-To: Step by Step Casserole
Step by Step Casseroles
Casseroles are usually made with five ingredients:
- Protein
- Vegetables
- Sauce
- Whole grains
- Toppings
Choose your own combination and serve a delicious budget-friendly meal.
Use these ingredients to make your casserole:
Protein (1 cup, fully cooked)
Choose one of the following:
- Beef (lean) cuts, cubed or ground
- Chicken, boneless skinless breasts or thighs
- Ham (low sodium), diced
- Beans or lentils, canned
- Tuna, canned or pouch
Vegetables (1 ½ - 2 cups)
Choose one or a combination of the following:
- Greens (kale or spinach), chopped
- Mixed vegetables, canned or frozen
- Zucchini or yellow squash, sliced
- Mushrooms, sliced
- Broccoli, sliced
- Bell pepper, sliced or diced
- Carrots or celery, sliced
- Green beans
- Onion, sliced or diced
Sauce
Choose one of the following:
- Low-sodium cream of soup, such as mushroom, chicken, or tomato (10-ounce) plus ¼ cup nonfat milk
- Low-sodium diced tomatoes (14.5 ounce can drained, approximately 1 cup) plus ½ cup reduced-fat sour cream
Whole Grains (1 ½ cup, cooked)
Choose one of the following:
- Brown rice
- Whole grain pasta
- Instant barley
- Whole grain couscous
- Cubed whole wheat bread, (1 cup)
Toppings (1/2 cup)
Choose one of the following:
- Grated low-fat cheese
- Bread crumbs
- Crushed corn flakes
- Crushed whole-grain crackers
Try this combination!
- Preheat oven to 350°F
- Wash your hands well with soap and warm water for at least 20 seconds.
- Cook whole grains according to package directions.
- Wash fresh vegetables and slice if needed.
- Thaw frozen vegetables and drain.
- Drain canned ingredients.
- Add protein, vegetables, and cooked grains to large bowl.
- Add ingredients for sauce.
- Add salt and pepper to taste.
- Stir to combine.
- Add ingredients to baking dish.
- Sprinkle bread crumbs on top of mixture.
- Cover baking dish with foil.
- Place in oven and cook for 30-35 minutes.
- Remove foil and continue baking for 5 minutes, until top is brown and bubbly.
- Serve and enjoy!
- Refrigerate leftovers within 2 hours.
How To: Step-by-Step Pasta Dinner
The ideal pasta dinner is made with five key components, including whole grain options. Choose your own combinations and serve your family a delicious budget-friendly meal.
Put together your recipe with these components:
Pasta (1/2 pound)
- Whole grain pasta
- Brown rice pasta
Protein
- Lean ground beef, turkey or chicken, cooked and drained (1 pound)
- Beans, rinsed and drained (1 can or 2 cups cooked)
- Frozen peas or edamame (soy beans), thawed and drained (2 cups)
- Chicken or turkey sausage, cooked and sliced (1 pound)
Vegetables (2 cups total, any combo)
- Spinach, chard, or kale
- Broccoli
- Carrots
- Sugar snap or snow peas
- Zucchini or yellow squash
Sauce (1-2 cups)
- Marinara
- Peanut Sauce
- Canned diced or crushed tomatoes
- Quick Cheese Sauce
- Simple White Sauce
Seasonings (optional, to taste)
- Dried basil
- Dried oregano
- Garlic powder or minced fresh garlic
TRY THIS COMBINATION
DIRECTIONS
- Wash your hands well with soap and warm water for at least 20 seconds.
- Cook pasta according to package directions. Drain pasta in a colander.
- Cook the protein if needed.
- Cook vegetables by steaming, grilling, roasting, sauteing, or adding to boiling pasta water during the last few minutes of cooking.
- In a large pot over medium heat, heat sauce. Add optional spices.
- Add protein and vegetables to heat through. Toss with hot cooked pasta and serve.
- Add sauce and toss with pasta and vegetables.
- Refrigerate leftovers within 2 hours.
QUICK CHEESE SAUCE
- Carefully grate cheese
- In a small bowl, use a fork to whisk together 2 Tablespoons cornstarch and 1 cup non-fat or low-fat milk until smooth.
- In a large saucepan over medium heat, add milk mixture. Cook until thickened, stirring constantly about 5 minutes.
- Stir in cheese.
- Add dried mustard, then dried or fresh herbs, starting with 1/2 teaspoon, then to taste.
How-To: Step by Step Stir Fry
How-To: Step by Step Stir Fry
Makes 4 servings
Stir fry is usually made with five ingredients:
- Vegetables
- Meat
- Whole grain
- Sauce
- Seasoning
Choose a protein and fresh or frozen vegetables you have on hand for a delicious, budget-friendly meal.
Use these ingredients to make your Stir Fry:
Vegetables (2-3 cups total, any combination of fresh or frozen you have)
- Bell Pepper, sliced
- Carrots or celery, sliced
- Green beans or sugar snap peas, trimmed
- Mushroom, sliced
- Onion, sliced
- Zucchini or yellow squash, sliced
- Cabbage, thinly sliced
Meat (1 pound, trimmed & cut into bite-size pieces)
- Boneless, skinless chicken breasts or thighs
- Sirloin or flank steak
- Stew meat
- Pork tenderloin or boneless pork chops
Protein
- Eggs (2-4) cracked and scrambled
Seasoning (1 Tablespoon)
- Minced garlic
- Minced fresh ginger (or 1 ½ teaspoon ground ginger)
Sauce (1 recipe)
- Peanut sauce
- Spicy soy sauce
- Lemon stir fry sauce
Whole Grain (1 cup dry)
- Brown rice
- Whole grain couscous
- Instant barley
- Whole grain pasta
DIRECTIONS
1. Wash your hands well with soap and warm water for at least 20 seconds.
2. Cook whole grains according to package directions
3. Wash fresh vegetables and slice if needed
4. Thaw frozen vegetables and drain
5. If using onion and garlic, peel and slice the onion, and peel and mince the garlic
6. Cut meat into bite-size pieces
7. After handling raw meat, wash your hands well with soap and warm water for at least 20 seconds
8. In a large skillet heat one Tablespoon oil
9. Add meat (chicken) and stir occasionally until browned and cooked through, about 5-6 minutes
10. Transfer cooked meat to a plate
11. Add vegetables to skillet
12. Start with harder vegetables first (bell pepper & onion)
13. As they begin to soften, add the softer vegetables (yellow squash & zucchini)
14. Continue cooking until the vegetables are softened, about 10 minutes total
15. Add garlic and stir until fragrant, about 15 seconds
16. Add sauce mixture and heat until sauce thickens, about 1-2 minutes
17. Add meat
18. Serve over a whole grain
Lemon Stir Fry Sauce
(1 recipe for 4 servings)
1. Lemon juice (3 Tablespoons)
2. Low-Sodium soy sauce (3 Tablespoons)
3. Cornstarch (2 teaspoons)
4. Stir well to combine
Serve and enjoy. Refrigerate leftovers within 2 hours.
How-To: Use Leftovers
One of the easiest ways to plan ahead is to cook extra meats or whole grains and use them in different recipes.
Always label and date leftovers before freezing.
Cook Once, Eat Twice Food Examples:
Chicken
- Cook extra chicken breasts or thighs
- Cover and refrigerate or freeze meat
- Serve HappyHealthy's Easy Chicken Pot Pie recipe the first night
- Make HappyHealthy's Chicken Salad the next night
- Try Chicken Noodle Soup or Chicken Taco Soup
Brown Rice
- Cook extra rice
- Cover and refrigerate or freeze rice
- Serve with HappyHealthy's Slow Cooker Jambalaya the first night
- Prepare HappyHealthy's Fried Rice for the second meal
- Serve HappyHealthy's Chili over rice
Beef or Pork
- Cook HappyHealthy's Beef Stew
- Cover and refrigerate or freeze stew
- Serve the stew the first night
- Use stew to top a baked potato for the second meal
- Make HappyHealthy's Slow Cooker Pulled Pork for the first meal
- Serve it again on a bun or in a wrap
- The leftovers are great added to a salad
Whole Grain Pasta
- Cook extra macaroni or spaghetti
- Cover or refrigerate or freeze pasta
- Serve HappyHealthy's Spaghetti with Meat Sauce the first night
- Prepare pasta salad for the second meal
- Or toss roasted vegetables with the spaghetti
Eggs
- Cook hard-boiled eggs
- Peel and refrigerate the eggs
- Prepare HappyHealthy's Tuna Salad the first night
- Enjoy cooked eggs by themselves, added to a salad, or make deviled eggs for the second meal
Discover lots of ways to be creative with recipes and leftovers to keep your family HappyHealthy!
Prepare Leafy Greens
How to Prepare Leafy Greens for Cooking
It's easy to cook your favorite leafy greens!
For greens like cabbage, kale, spinach, collard greens, and others:
- Take off outside leaves, if needed. Remove wilted or brown leaves and dispose.
- Rinse completely under cold running water.
- Place in colander to drain.
- Place leaves in a plastic bag with a paper towel and store in refrigerator until you want to cook them.
When ready to cook kale:
- Cut out the hard stems.
- Stack about 3-4 leaves on top of each other. Roll them up.
- Use sharp knife and cut rolls into thin slices.
For iceberg lettuce:
- Hit the head on the counter to loosen the core and remove.
- Run cold water over lettuce head
- Place lettuce head in colander to drain.
- Store lettuce in a plastic bag with paper towel in refrigerator until ready to use.
Preparing to Cook
Preparing to Cook
- Put Everything in Place
Professional chefs call this Mise en Place (Pronounced meez on plahs)- Before you cook, gather all the tools and equipment you need.
- Gather all the ingredients.
- Wash, trim, cut, prepare, and measure all the ingredients.
- Prepare the equipment—preheat the oven, line baking sheets, etc.
- Now, you’re ready to go!
- To Measure Liquids
- Use a glass measuring cup with measured amount indicated on the side of the cup.
- Place cup on flat surface.
- Look at it at eye level as you fill the cup to the needed line.
- To Measure Dry Ingredients
- Use a measuring cups set.
- The measuring cups will have the measurement on it.
- Spoon or scoop the ingredient lightly into the measuring cup.
- Run a knife across the top of the powder to level the surface.
- Scrape off excess.
Quick and Easy Breakfast Ideas
Quick and Easy Breakfast
It’s absolutely true—breakfast is the most important meal of the day. A healthy breakfast:
- Helps adults focus at work or children focus at school
- Promotes good health
- Improves memory and concentration
- Breakfast together can be a shared food time for the family
It’s easy to give your family breakfast that is:
- Healthy
- Time saving
- Tasty
There are lots of recipe options for breakfast at home or on the go:
- Egg dishes
- Whole grain options
- Fruit and vegetable specialties
EGG OPTIONS
Make an Omelet in a Mug. It only takes about 2 minutes!
- Spray the inside of a large, microwave-safe mug lightly with cooking spray
- Crack 1 large egg into mug
- Add grated cheese and other extras such as chopped red bell pepper or chives
- Add a sprinkle of salt and pepper
- Stir with a fork until well mixed
- Microwave on high for 30 seconds
- Remove from microwave and stir with a fork
- Return to microwave and cook for another 20-30 seconds
Add eggs to sauteed vegetables and spoon into tortillas to make quick breakfast tacos, burritos or quesadillas.
WHOLE GRAIN OPTIONS
Oatmeal is #1! Check out HappyHealthy's Overnight Oats with Blueberries recipe and How To: Oatmeal Your Way for lots of delicious new ideas.
Make toast extra special:
- Use whole grain bread
- Spread peanut butter on the toast
- Add your favorite toppings:
- Bananas
- Strawberries
- Blueberries
FRUIT AND VEGETABLE OPTIONS
- There are several popular recipes on HappyHeathy.ms for you to try
- “Berry Blast Off” combines fresh fruit with yogurt for a quick breakfast
- For something special for your family, make this HappyHeathy recipe:
Makes 1 serving; 8 ounces each serving
INGREDIENTS
- 1 small to medium banana
- ¼ cup oat or whole wheat cereal
- ¼ cup low-fat yogurt
- 3 medium strawberries
- 12 blueberries
- 1/4 teaspoon honey
DIRECTIONS
- Wash your hands well with soap and warm water for at least 20 seconds.
- Peel banana, cut in half, and place in a bowl.
- Top banana with yogurt and cereal.
- Wash and cut strawberries into small pieces and add to the top of the yogurt.
- Wash blueberries and add to the top of the yogurt.
- Drizzle honey on top of fruit.
- Refrigerate leftovers within 2 hours.
- Check out these quick and easy breakfast recipes:
Quick and Easy Snack Ideas
Quick and Easy Snacks
Snacks are important. Healthy snacks are good for you:
- Improve health
- Stop food cravings
- Improve your mood
- Manage hunger
How to Make Healthy Snacks a Habit
- Keep healthy snacks on hand
- Prepare them ahead of time and take them to work or school
- Plan so you can avoid buying unhealthy sweet and salty snacks at the convenience or grocery store
- Have snacks available if you get hungry between meals
There are lots of options for healthy snacks:
- Fresh, canned or frozen fruits
- Fresh, canned or frozen vegetables
- Low-fat milk or yogurt
- Whole grains
- Nuts and seeds
The Quickest Healthy Snacks
Brown Bag Popcorn
- Make it in the microwave
- No oil needed
1/3 cup popcorn kernels
1 medium brown paper bag
Seasoning to taste
- Add popcorn to the bag
- Fold the top of the bag over twice
- Place bag in microwave
- Microwave on high for 1½ to 2 ½ minutes until the popping has a 1-second gap between pops.
- Remove the bag. Caution: the bag may be hot.
- Season with your favorite spices
Hummus and Fresh Vegetables
Plan on having vegetables cut up and stored in the refrigerator to enjoy with dip.
Check out our recipe for Hummus Spread. Serve with colorful assortment of fresh vegetables for dipping:
- Bell peppers
- Carrots
- Celery
- Broccoli
- Cauliflower
- Cucumbers
- Radishes
Simple Snacks:
Try these Energy Bites for your family!
Makes 4 servings; 3 pieces each serving
INGREDIENTS
- 1 cup oats (old fashion or instant)
- ½ cup peanut butter
- 1/4 cup honey
DIRECTIONS
- Wash your hands well with soap and warm water for at least 20 seconds.
- Add oats, peanut butter, and honey to a bowl and mix until ingredients are combined. Place the bowl in refrigerator for 30 minutes. This will make rolling the balls easier.
- Use a tablespoon to scoop out mixture and then roll into a ball with your hands. Repeat until mixture is gone, should make about twelve balls.
- Refrigerate leftovers within 2 hours.
Roast Vegetables
How to Roast Vegetables
Ingredients
-
1 to 2 pounds of any vegetable
-
1 Tablespoon oil
-
½ teaspoon salt
-
½ teaspoon pepper
Directions
- Wash your hands well with soap and hot water.
- Preheat oven to 400° F.
- Wash vegetables under cold running water.
- Drain vegetables in colander.
- Cut vegetables into bite-size pieces, all about the same size.
- Place vegetables in large bowl or plastic bag.
- Pour oil on top of vegetables.
- Sprinkle with salt and pepper.
- Stir or shake until all vegetables are coated with oil, salt and pepper.
- Spread vegetables on baking sheet in an even layer.
- Place baking sheet in oven. Cook soft vegetables 20-25 minutes. Cook hard vegetables 30 minutes or longer.
- Check vegetables and turn once. Cook longer if you need to.
- Vegetables are done if soft when stuck with a fork.
- Refrigerate leftovers within 2 hours.
Sharpen Your Knife Skills
How to Sharpen Your Knife Skills
The two most useful knives are:
- Chef knife
- Paring knife
Chef Knife
Use to cut and dice fruits, vegetables, meat and fish.
To hold the chef knife:
- Make sure the knife is sharp.
- Place your thumb on the inside of the handle.
- Place first finger on outside of handle, and last three fingers under handle.
- With your other hand, hold what you are about to cut.
- Make sure all your fingers are standing up facing down to prevent getting cut.
- Cut down through food onto board and push blade out forward. Down and through.
Paring Knife
Use for cutting, slicing and peeling smaller things like garlic or strawberries.
To use the paring knife:
- Make sure the knife is sharp.
- For slicing:
- Place fruits or vegetable on cutting board.
- Place knife near one end and push it straight down as you slide the blade across.
- For peeling:
- Hold food with your first finger and your thumb.
- Hold paring knife in your stronger hand with three fingers.
- Place first knuckle of first finger against dull side of knife blade.
- Place edge of knife at the top of food below your finger.
- Cut into food just a little bit, putting knife between the food’s skin.
- Peel skin downward toward thumb.
- Repeat until all the skin is removed.